Installing Go The Easy Way
You might not need to do this
If you are at school on a school computer then you do not need to do this. Your teacher or your school ICT coordinator should have installed Go for you already.
If you are at home or on your own computer, you will need to install Go.
Installing Go the easy way
The simplest way to install Go is to install our Virtual Machine. A Virtual Machine or VM for short is an emulation of another computer that runs on your computer. Our virtual machine has everything you need to get started programming in Go already installed.
The virtual machine is completely isolated from the computer that it runs on. It is also isolated from the operating system used by the machine it runs on. This means changes made inside the virtual machine stay inside the virtual machine. Any changes made inside the virtual machine won’t affect the rest of the computer, making it safe way to install the programming environment on a shared family computer.
If you are using a Raspberry Pi
This is what we use at the Code Clubs
This is the same virtual machine we use at the Gopher Coders Code Clubs that we run in schools.
If you are one of our pupils then installing the virtual machine machine will set up the same environment you already use at the Code Club.
How to install the virtual machine
Before you start you’ll need to check that you have about 10GB, Gigabytes, of free disk space and at least 2GB of memory in your computer.
You need to download and install the virtual machine software that you will need. We recommend using VirtualBox to run our virtual machine.
Installing VirtualBox is easy. You just need to download it from the VirtualBox download page.
Make sure you download the correct version
Make sure you download the correct version of Virtual Box for your computer. The host operating system is the operating system that your computer runs.
If you computer runs Windows you need to download the version of VirtualBox for Windows hosts. If your computer is an Apple Mac you need to download the version for OS X hosts.
If you computer runs Linux you will need to download the appropriate Linux package.
Once you have downloaded VirtualBox you need to install it. To do this you just need to double click on the file you have downloaded and follow the installers instructions. A longer version of the install instructions are available on the VirtualBox Users Guide on the VirtualBox website.
If you are installing on a Linux host
If you are installing on a Linux host make sure you install the Dynamic Kernel Module Support, DKMS,package first.
There is more information on how to do this in the VirtualBox manual.
Once you have installed VirtualBox you need to start it.
On a Windows host, in the standard Programs menu, click on the item in the VirtualBox group. On Windows 7, you can also type VirtualBox in the search box of the Start menu.
On a Mac OS X host, in the Finder, double-click on the VirtualBox item in the Applications folder. (You may want to drag this item onto your Dock.)
On a Linux, depending on your desktop environment, a VirtualBox item may have been placed in either the System or System Tools group of your Applications menu. Alternatively, you can type virtualbox in a terminal.
When you first start VirtualBox you will see a new window, similar to this:
You are now ready to setup the GopherCoders virtual machine.
Installing the GopherCoders.com virtual machine
We have packaged our virtual machine as a virtual appliance in an OVA, Open Virtualisation Format Archive file.
Download our OVA file to your computer by clicking on the button below.
Download the GopherCoders.com Virtual Machine
Be patient
We keep our virtual machine on the Sourceforge website. The download button will redirect you to SourceForge before the download starts. By using SourceForge it means we can provide faster access to the virtual machine to anyone around the world.
The OVA file is big, about 2 gigabytes (GB), in size so it may take a few minutes or more to download depending on the speed of your internet connection.
Once the download has started you can use your browsers back button to come back to the install instructions.
Once you have downloaded the file you need to import it into VirtualBox. To do this select the Import Appliance… option from the File menu. You should now see a window that looks like this:
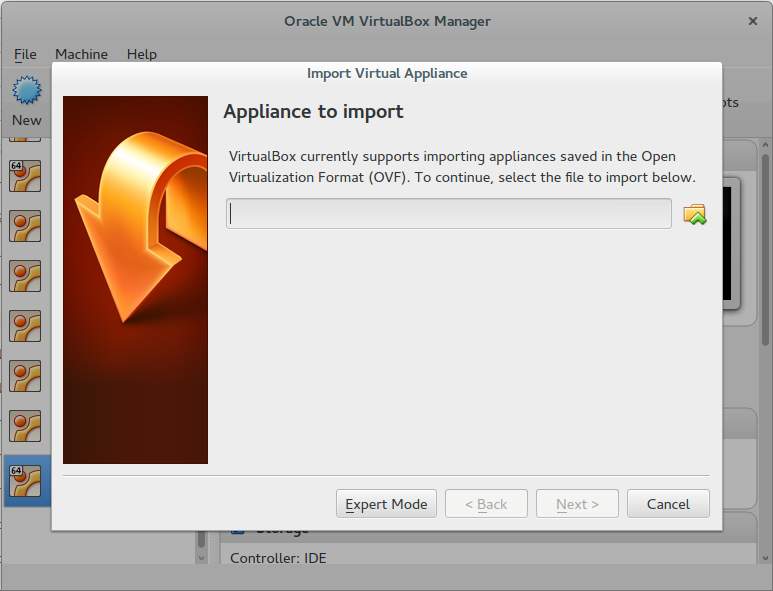
Click on the folder icon on the right, ![]() , and select the GopherCodersVM.ova file.
, and select the GopherCodersVM.ova file.
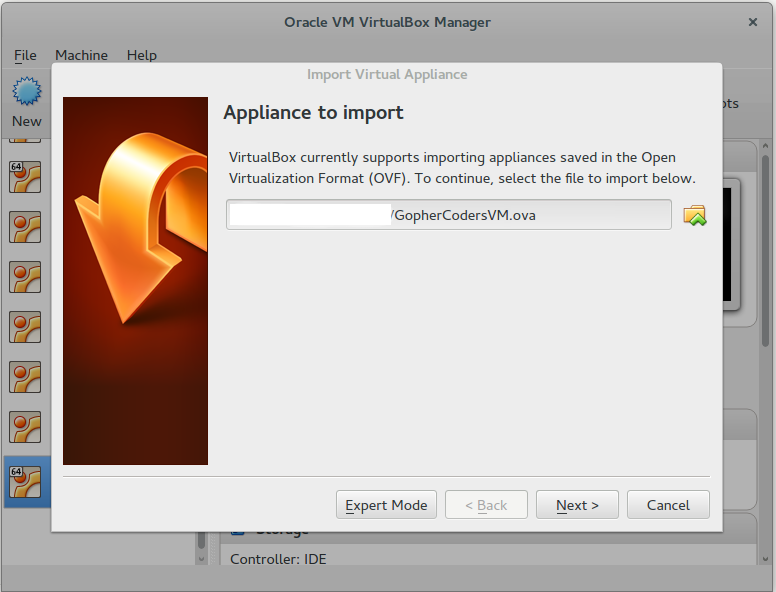
Click Next and you should see this:
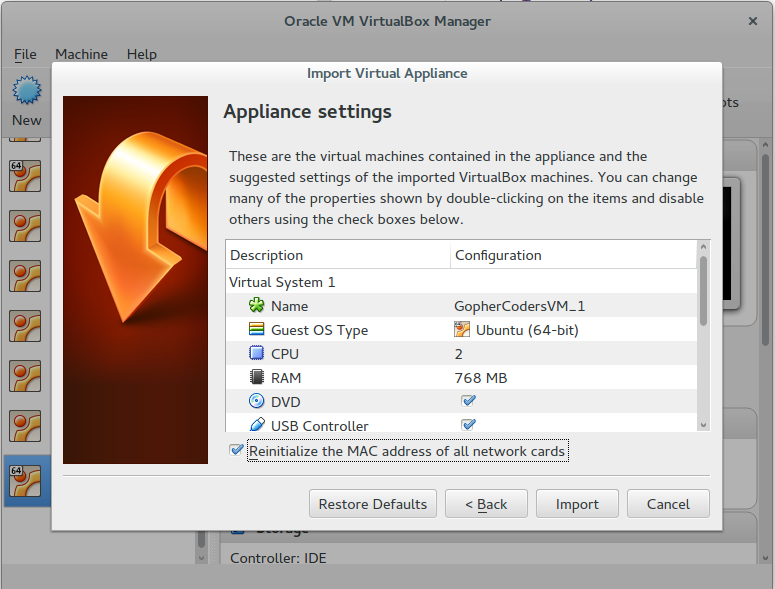
Be patient
Now click Import and VirtualBox will import the GopherCoders virtual machine for you.
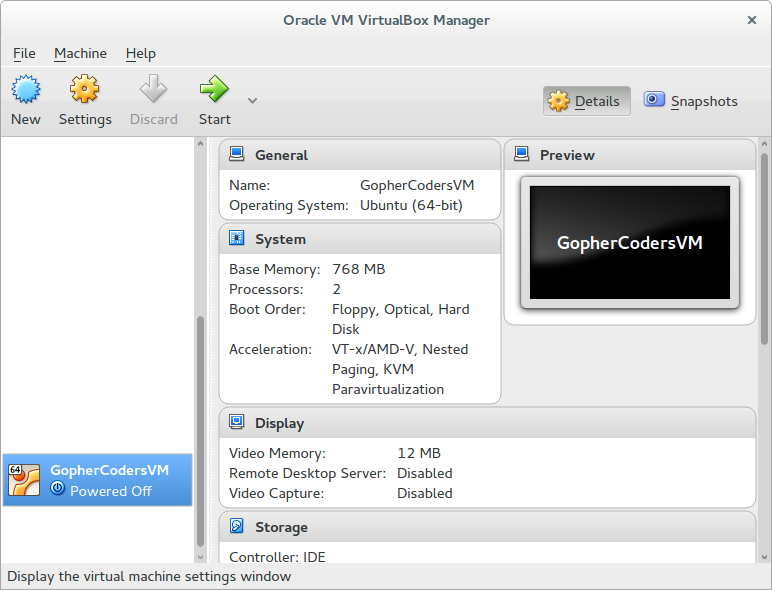
Once imported the new virtual machine will show up in the VirtualBox main window.
Renaming the Virtual Machine
 button at
the top of the VirtualBox window. You will now be able to rename the virtual machine.
button at
the top of the VirtualBox window. You will now be able to rename the virtual machine.
Now that you have the virtual machine you can start it by selecting the virtual
machine and clicking on the  button.
You can now safely delete the GopherCodersVM.ova file that you downloaded earlier. This will free up a substantial amount of disk space on your computer.
When the virtual machine starts up you will see a screen like this.
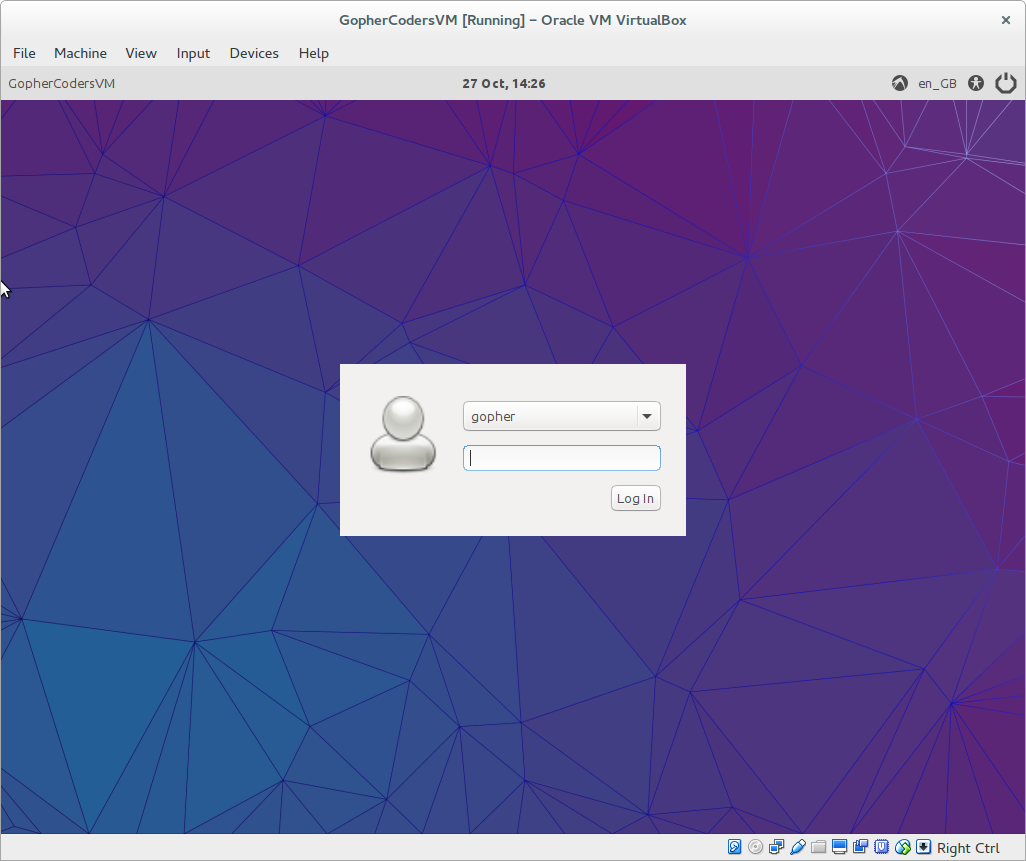
Virtual Machine Login Details
The login details for the virtual machine are:
User name: gopher
Password: coder
You can select the user name from the drop down box in the login window. You will always need the password to login to the virtual machine. Both the user name and the password are case sensitive, so make sure you type them in lower case.
You will, from time to time, need to administrator or super user password. This is:
Super user password: coder
Once you login you will see the virtual machine’s desktop
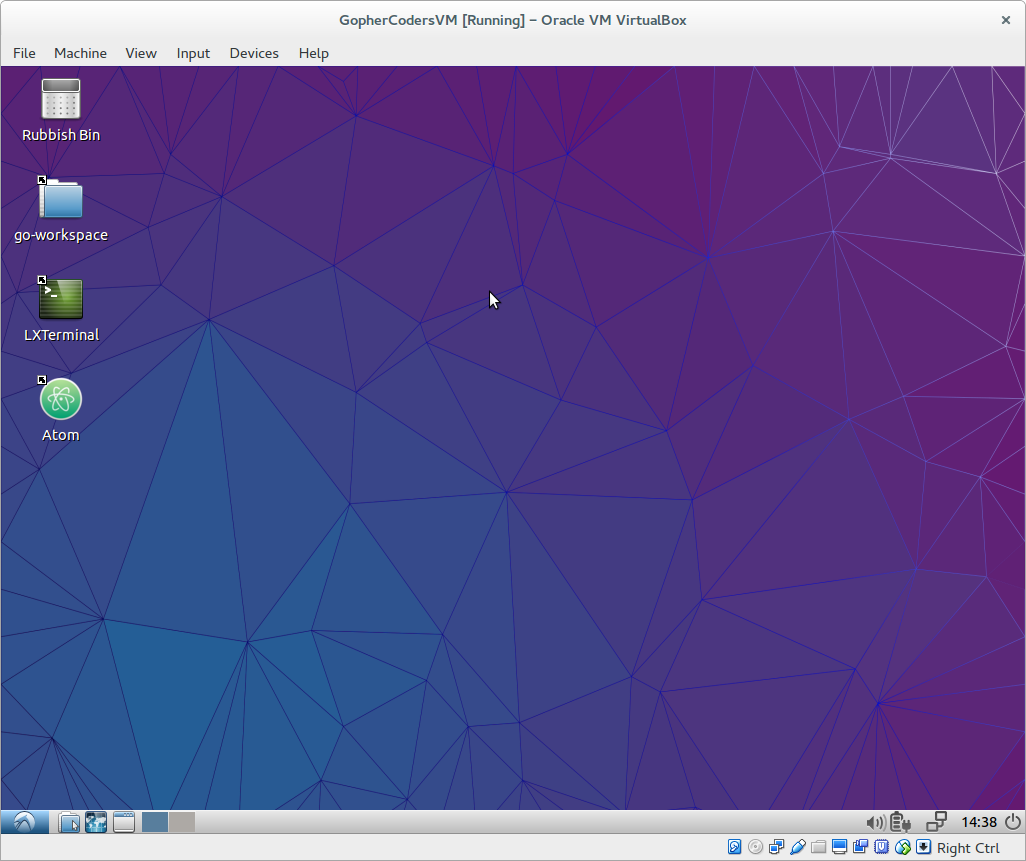
You are nearly there. The last thing you need to do is to install the guest additions into the virtual machine.
Install the guest extensions
Now that virtual box is up and running you should install the VirtualBox Guest Extensions. These allow you to resize the display, to share the clipboard with the virtual machine , provide better mouse pointer integration and allow you to create a shared folder between your computer and the virtual machine to exchange files.
Why we can't do this for you
Unfortunately we can’t do this bit for you, sorry. The version of the guest additions has to match exactly the version of VirtualBox you are using or the guest additions may not work correctly.
We cannot tell what version of VirtualBox you have just installed, but it is likely to be a newer version than when we created the virtual machine.
The only way to ensure that the version of the guest additions match the version of virtual box is to have you install them.
The good news is that you only have to do this once for each version of virtualbox you have installed or upgraded to.
To install the guest additions you need to select Insert Guest Additions CD image.. from the Devices menu. When you do this the virtual machine will ask you if you want to open the removable medium. The window will look like this:
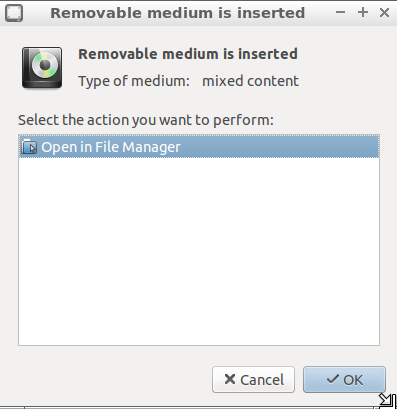
Select OK and the file browser window will open showing you the contents of the guest additions CD.
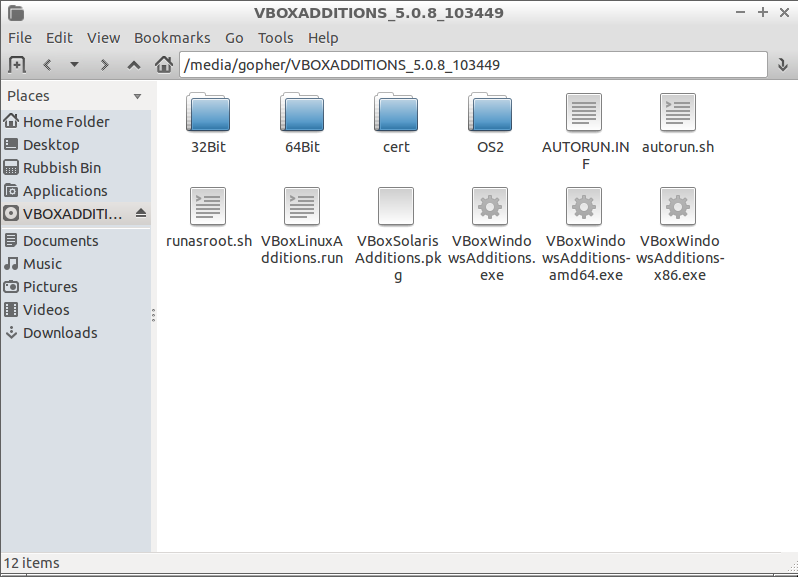
To install the guest additions you have to use the LXTermial window. Double click on the LXTerminal icon on the desktop to start a new terminal. This will open a new terminal window.
Now you need to use the cd command to change directory.
First you need to copy the directory path in the file browser.
Second you need to type cd in the terminal followed by a space, followed by
pasting the directory path from the clipboard. To paste into the terminal window,
you have to right click, and select Paste.
The result should look like this:
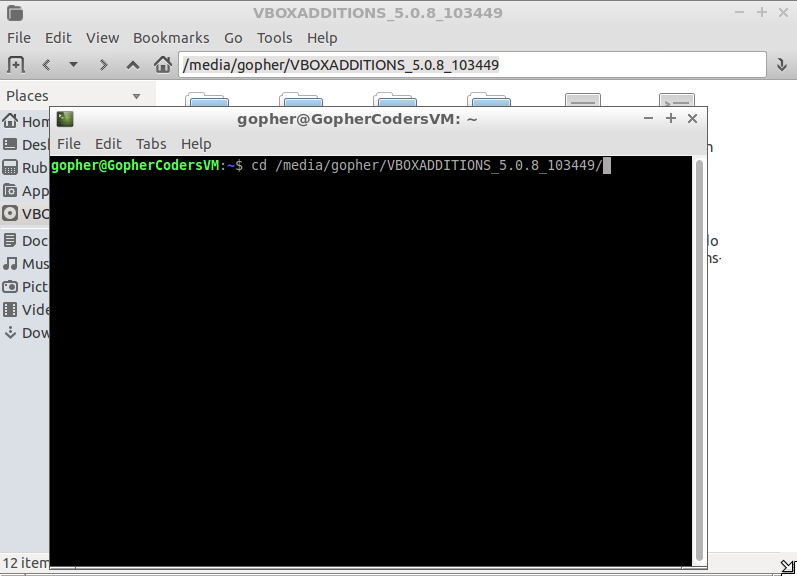
Now press Return.
Now type the following to install the guest additions
Installing the Guest Additions in the Virtual Machine
sudo ./VBoxLinuxAdditions.runexactly as you see it into the terminal and then press Return.
You will be prompted to enter the Super User Password. Remember that this is
the same password, coder, that you typed in to login as the gopher user.
You won’t see any *’s when you do this. This is normal.
The guest additions install will then begin. You will know when it has finished when the install messages stop appearing in the terminal and the green and blue terminal prompt returns.
Once the install has completed you can now close the terminal window. You now need to eject the Guest Additions CD. You can do this the by clicking on the eject button next to the Guest Additions CD name in the file manager.
You can now close the file manager window if it is still open.
You will need to power down the virtual machine by closing the Virtualbox window, and then start it again before the guest additions will take effect.
Now you are all set to start programming in Go.
So what’s in the Virtual Machine
The virtual machine contains everything you need to get started with programming in Go.
The virtual machine is based on lubuntu which is a version of the Ubuntu. Ubuntu is itself based on Linux.
We have installed the Go programming language and the tools you need to build Go programs. We have also installed and configured the Atom editor. You’ll use Atom the type in your programs. We have also set up a terminal, called LXTermial for you. Both LXTerminal and Atom have desktop shortcuts.
This is all you need to program in Go. Everything has been setup and tested for you.
Make sure you follow the Linux instructions
The Firefox web browser is installed. We have added book marks to both the Go home page and to the GopherCoders.com home page.
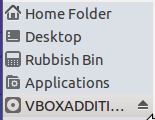
You’ll find lots more software under the Lububtu menu. Just click on the  button to
see what’s there.
button to
see what’s there.
You can also install more software though the Lubuntu Software Centre. You’ll find this under System Tools menu.
Looking after your virtual machine
Make sure you keep things upto date
You have to look after your virtual machine, in the same way as you have to look after any other computer.
We have set the software updater to run once per day. If you see it in the menu bar, you need to click on it and install all of the updates that it has found.
    <img  src="/images/install/virtualbox/virtualbox-software-updater.png" />


<figcaption class="text-center">
    Fig-12: The software updater in the menu bar

</figcaption>
You will need to use the Super User password to install the updates.
This will keep you virtual machine upto date with the latest software and security fixes.
What next?
Now that everything is installed, you should start with the first lesson, that teaches you how to use numbers in Go.
Installing Go the hard way
If you want you can install Go and all of the tools you will need directly onto you computer. The process is more complex and time consuming than installing our virtual machine.
If you want to try this then you need to follow the correct install guide for the operating system on your computer.
See our installation pages for more details.
